Recently I had to use an Ubuntu virtual machine (VM) for a course. However, the recommended method, using Oracle’s VirtualBox software, was not (at the time of this writing) supported for the ARM architecture (arm64/aarch64) which my M1 Mac laptop utilized. Therefore I had to find another way run a virtual machine, or I could give up and try to use an x86/amd64 computer (commonly known as an ‘Intel’ architecture computer). I decided to use the open source software, UTM. UTM is a GUI application which runs QEMU underneath, albeit with settings preconfigured to work with Mac computers.
I ended up referencing several guides before successfully being able to install the software. I decided to use the (as of this writing) beta version of the software, version 3.0.3, since the 3.X versions have incorporated a setup wizard that makes setup much easier. I ended up downloading the live server ISO file from the Ubuntu Server for ARM webpage, specifically, I ended up happening to use the long-term support (LTS) version Focal Fossa (20.4).
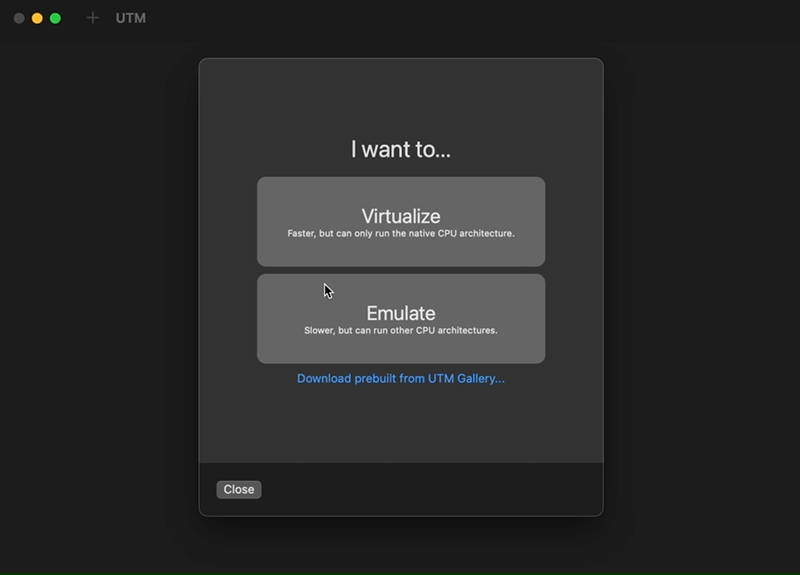
The next step was to configure the wizard, which was actually quite straightforward. After opening UTM, one simply presses “Create a new Virtual Machine”, then in this case, choosing “Virtualize” for the next step, then choosing “Linux” under the operating system section. Then, using the default virtualization (QEMU instead of Apple Virtualization), it is enough to then simply select the “Boot ISO image” by clicking “Browse” and selecting the downloaded ISO file. The following pages allow for configuring RAM, CPU, and maximum size of the drive (since this uses the qcow2 format, it will not actually use the full size at the beginning, rather, this sets an upper limit to the storage usage of the virtual machine). Pressing next to step through these options, we can pick a name for the installation and click “Save”.
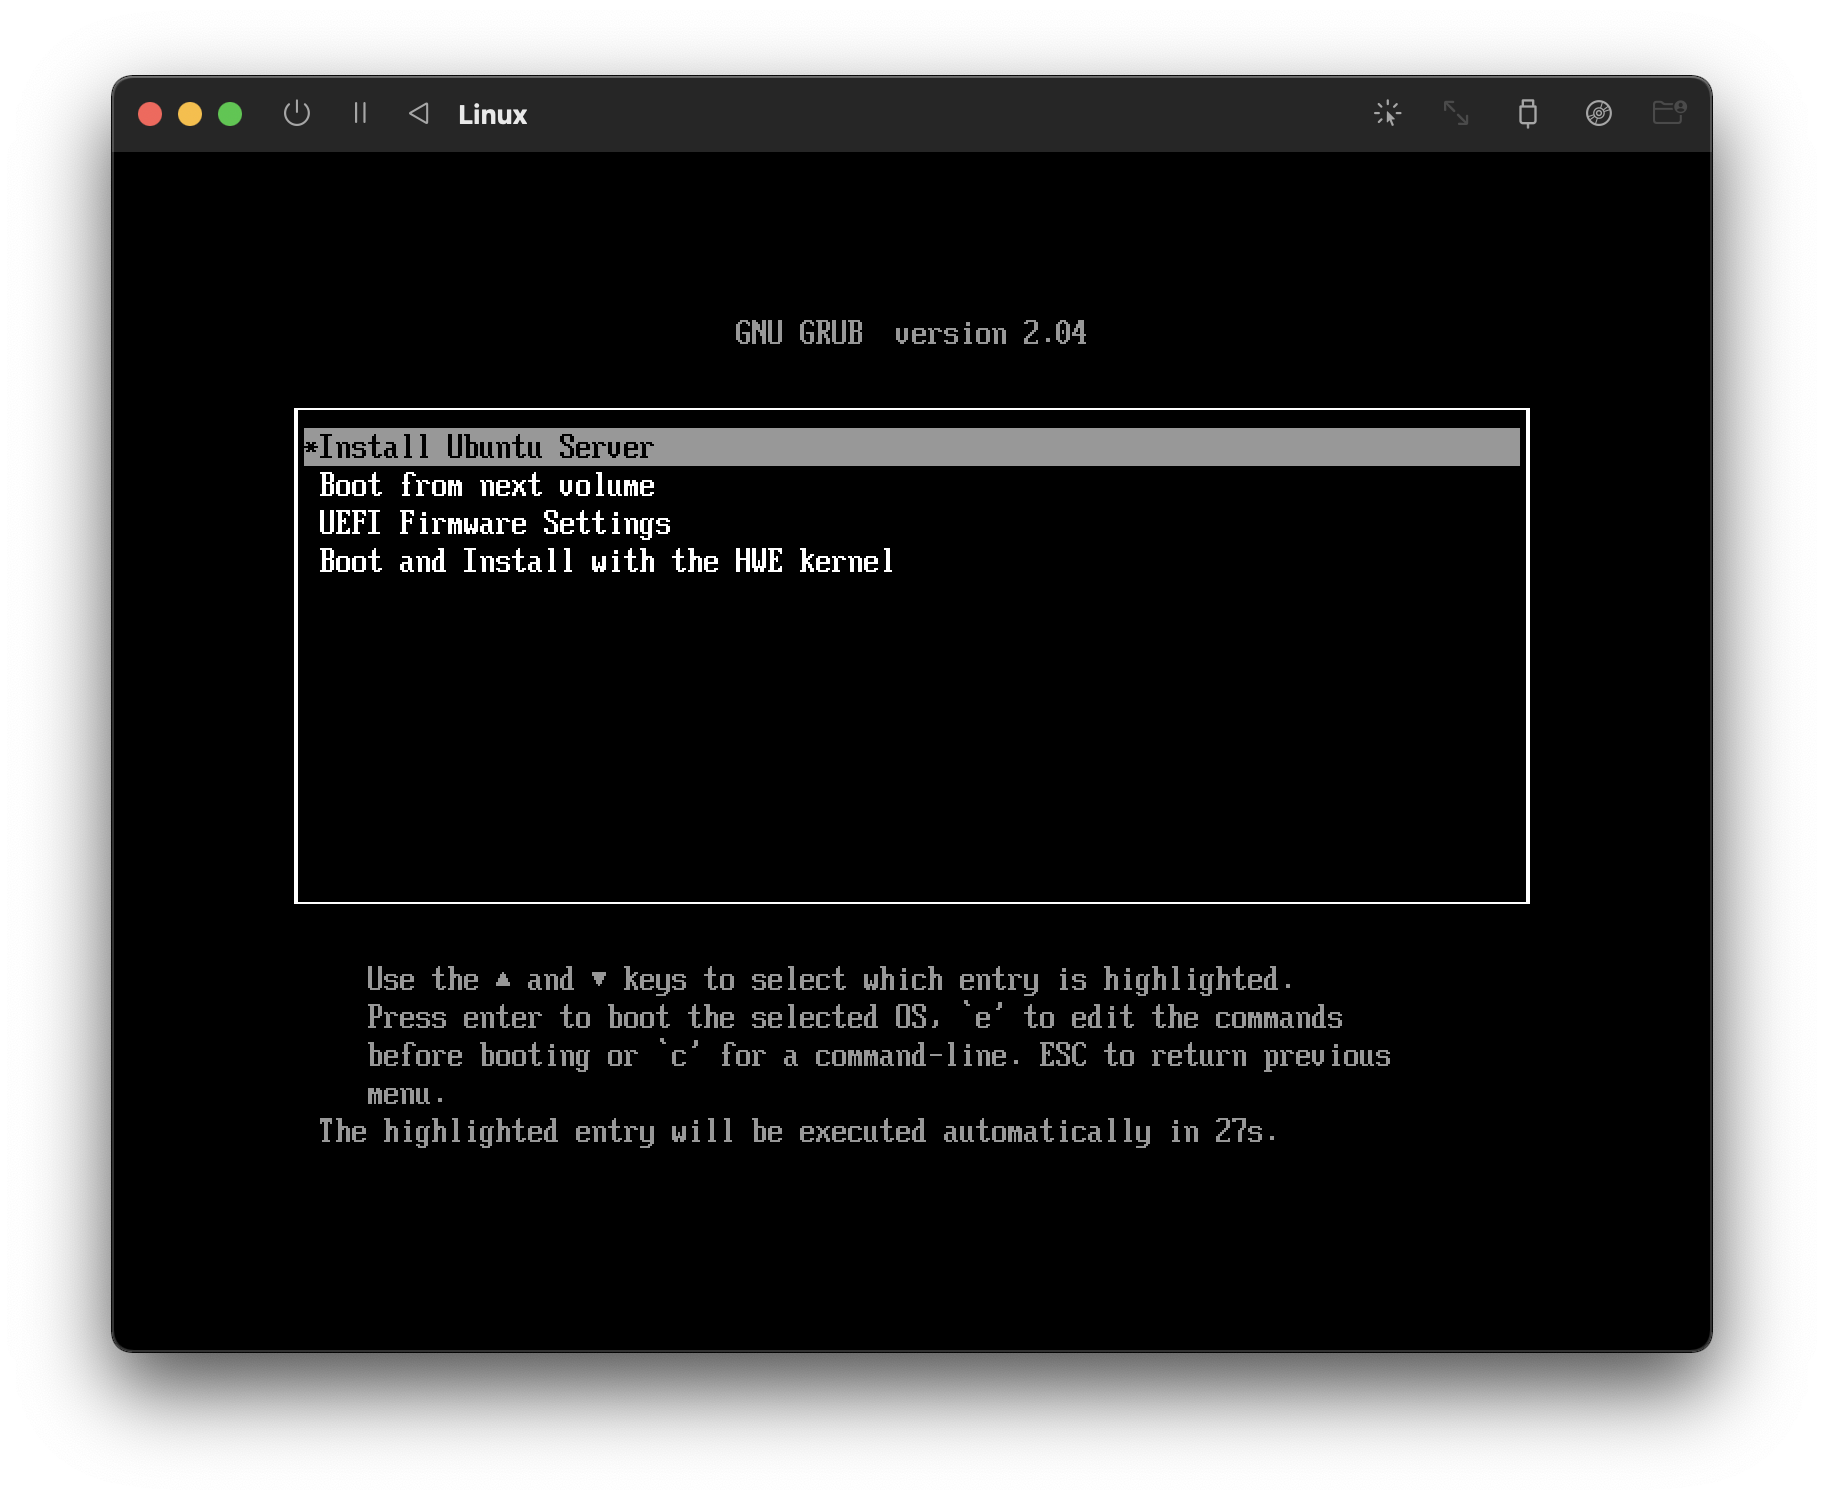
After this, the virtual machine can be booted from the sidebar in UTM (click in the taskbar “View” and “Toggle Sidebar” if you do not see it). Upon booting, choose the first install option in GRUB, (press Enter for “Install Ubuntu Server”). Choose a language, keyboard layout, network connection (you can probably leave this default and simply click next), proxy (can leave this blank as well), archive mirror (you can leave the default or pick one near to you for faster speeds). Go through the settings, pick a Name, Username, Hostname, and install.
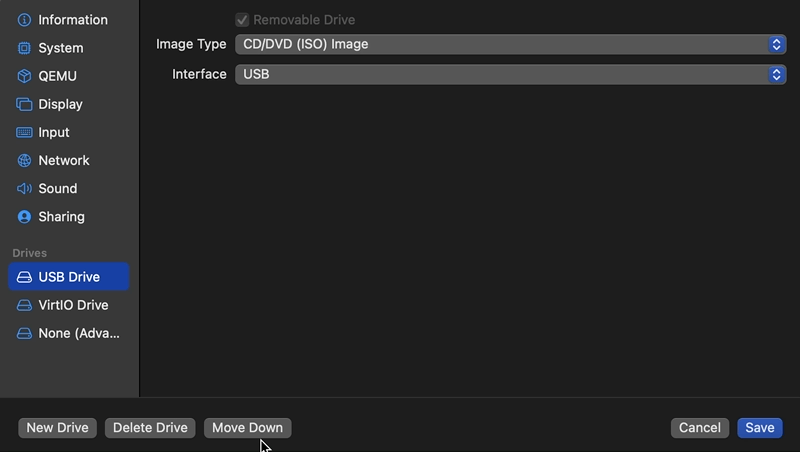
Next, after exiting the installer and rebooting, you might notice that the UTM virtual machine is unable to boot (as of the 3.0.3 beta). Here you need to right click the VM and press “Edit”, look at the section titled “Drives” on the left-hand side, select the “USB Drive”, and press “Move down” to move it to a lower boot priority.
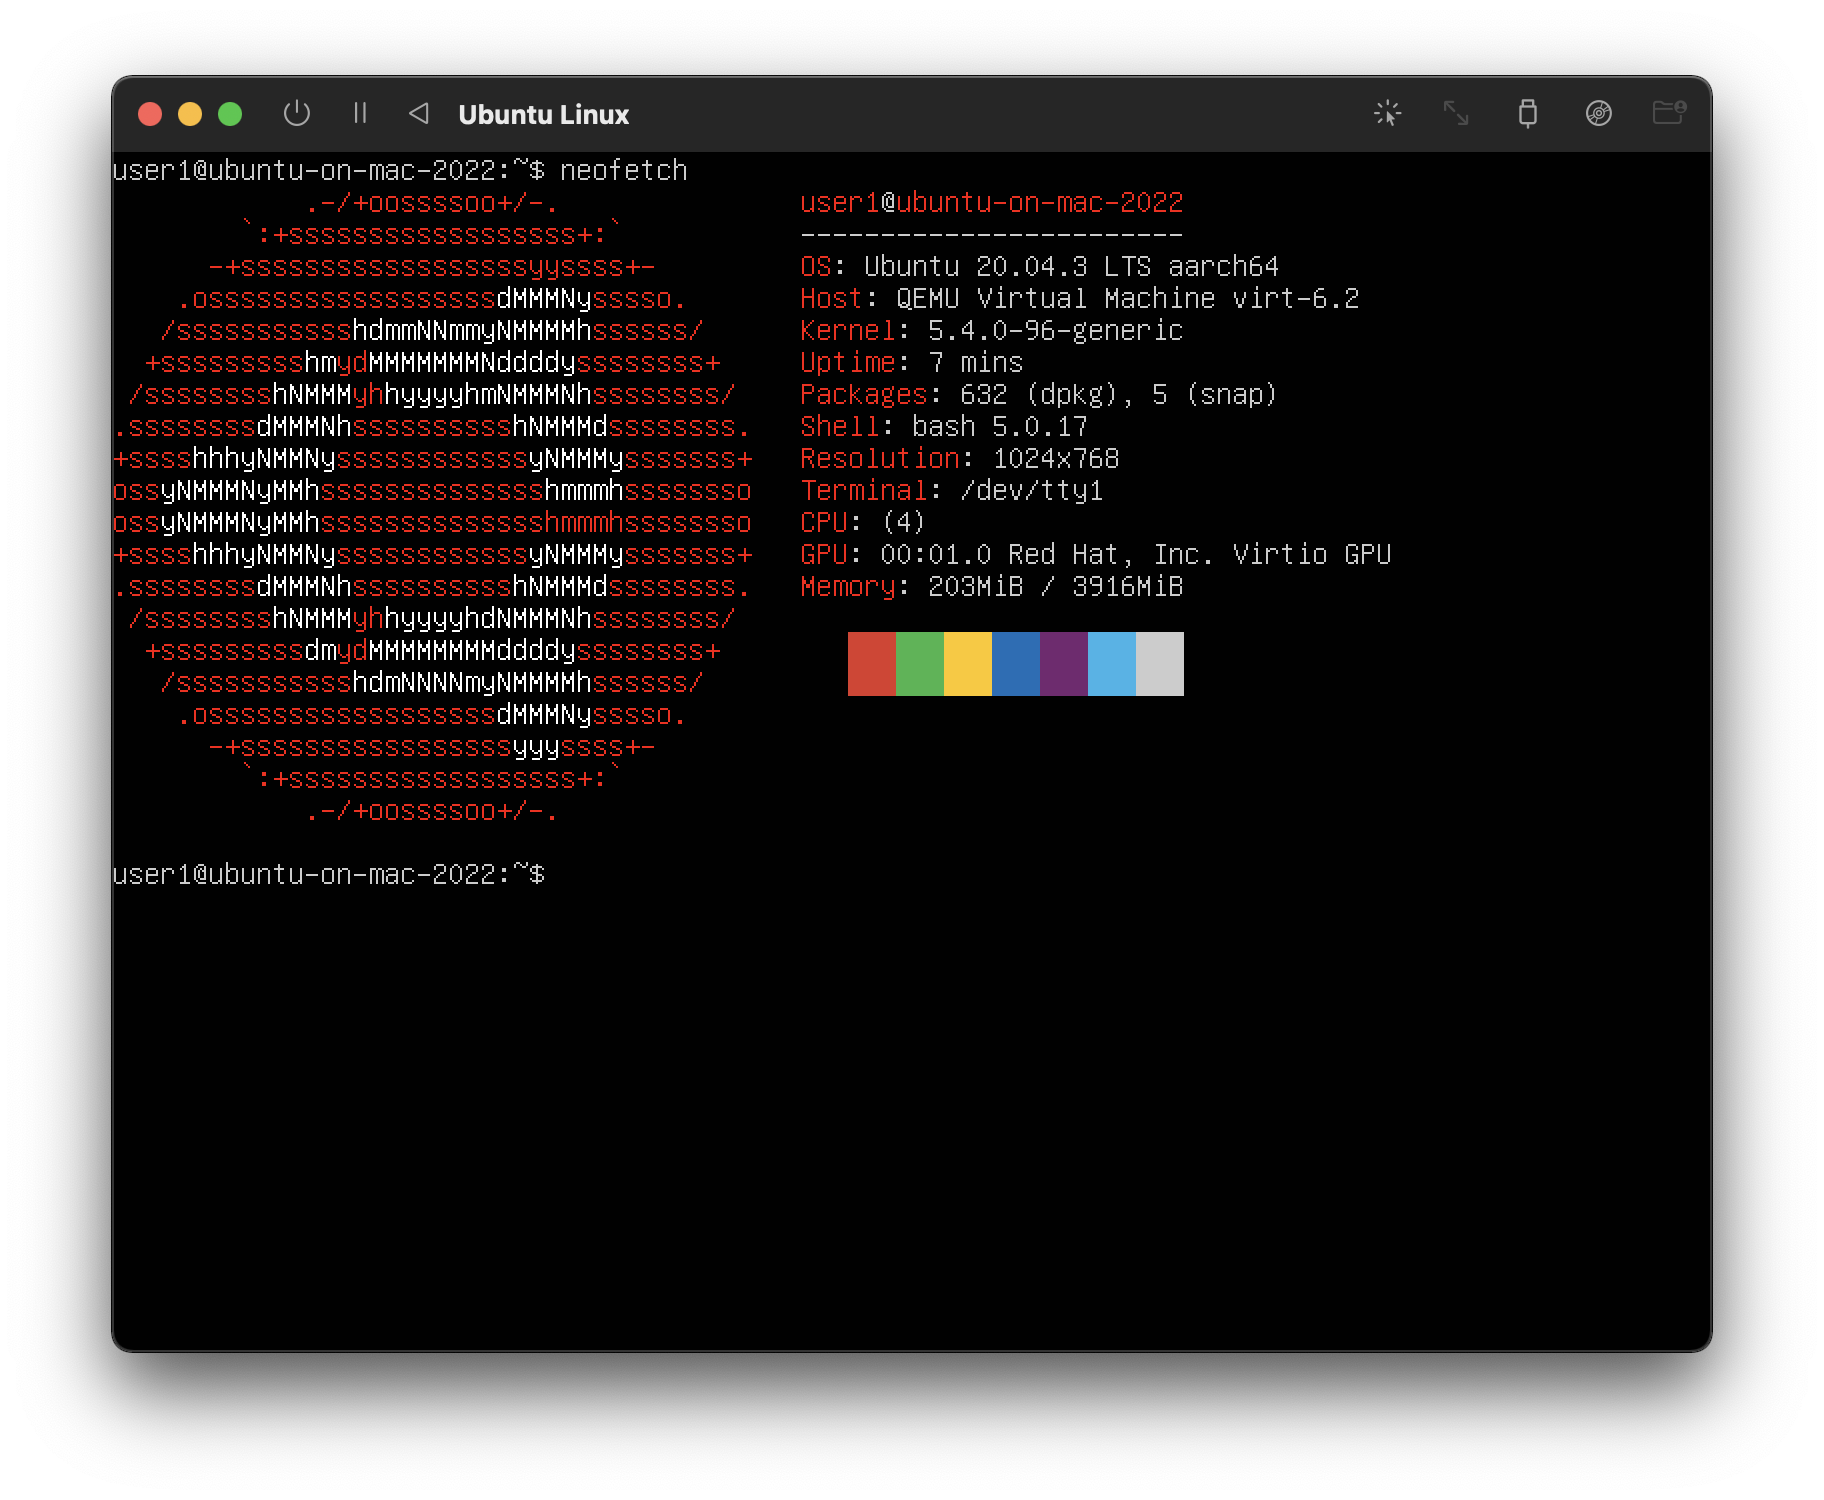
Now, when you try to boot the VM, you should be presented with a console. You can login and use the operating system!
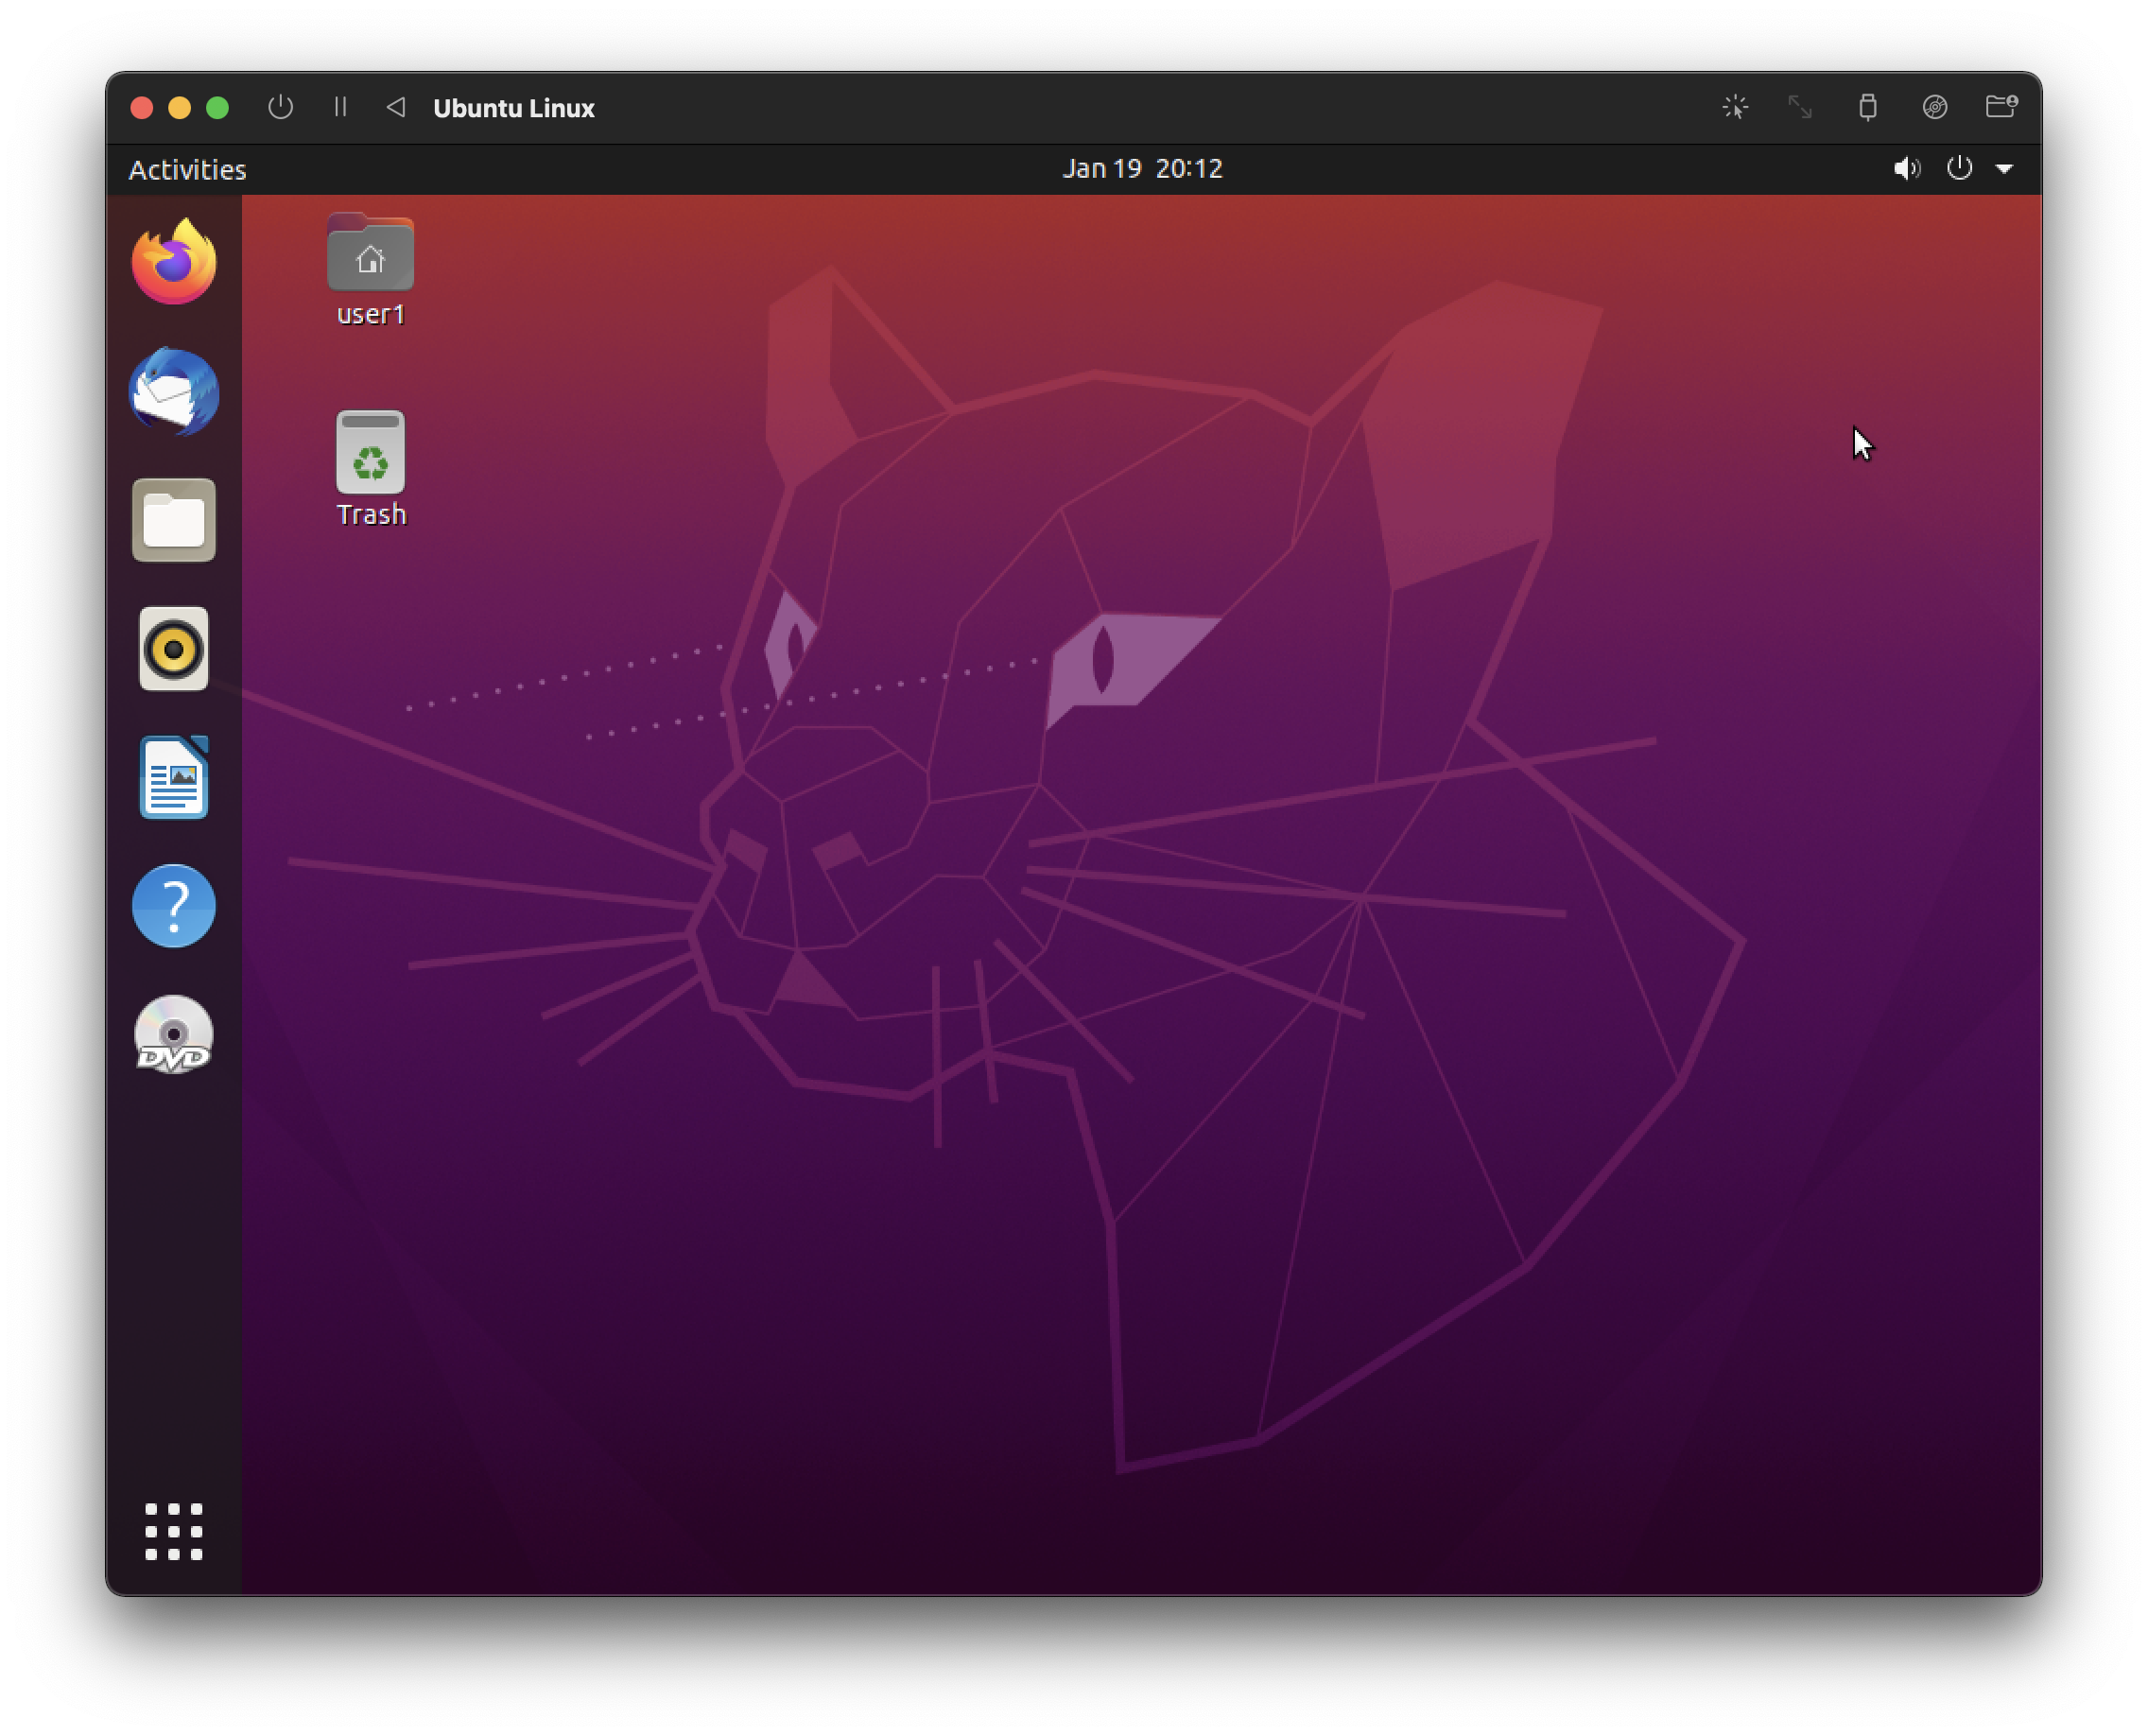
Finally, perhaps you do not want to simply use everything in the
terminal and you want to use a graphical user interface (GUI) desktop as
you are accustomed to using. You can run
sudo apt install ubuntu-desktop (or use another desktop, see here).
Then run sudo apt install lightdm to install the LightDM
display manager (if you are not sure what this is, just know that a
display manager is needed to use the GUI). Finally, run
sudo services lightdm start to start the GUI. You will be
presented with a colorful login page where you can enter your password
and enjoy the desktop!
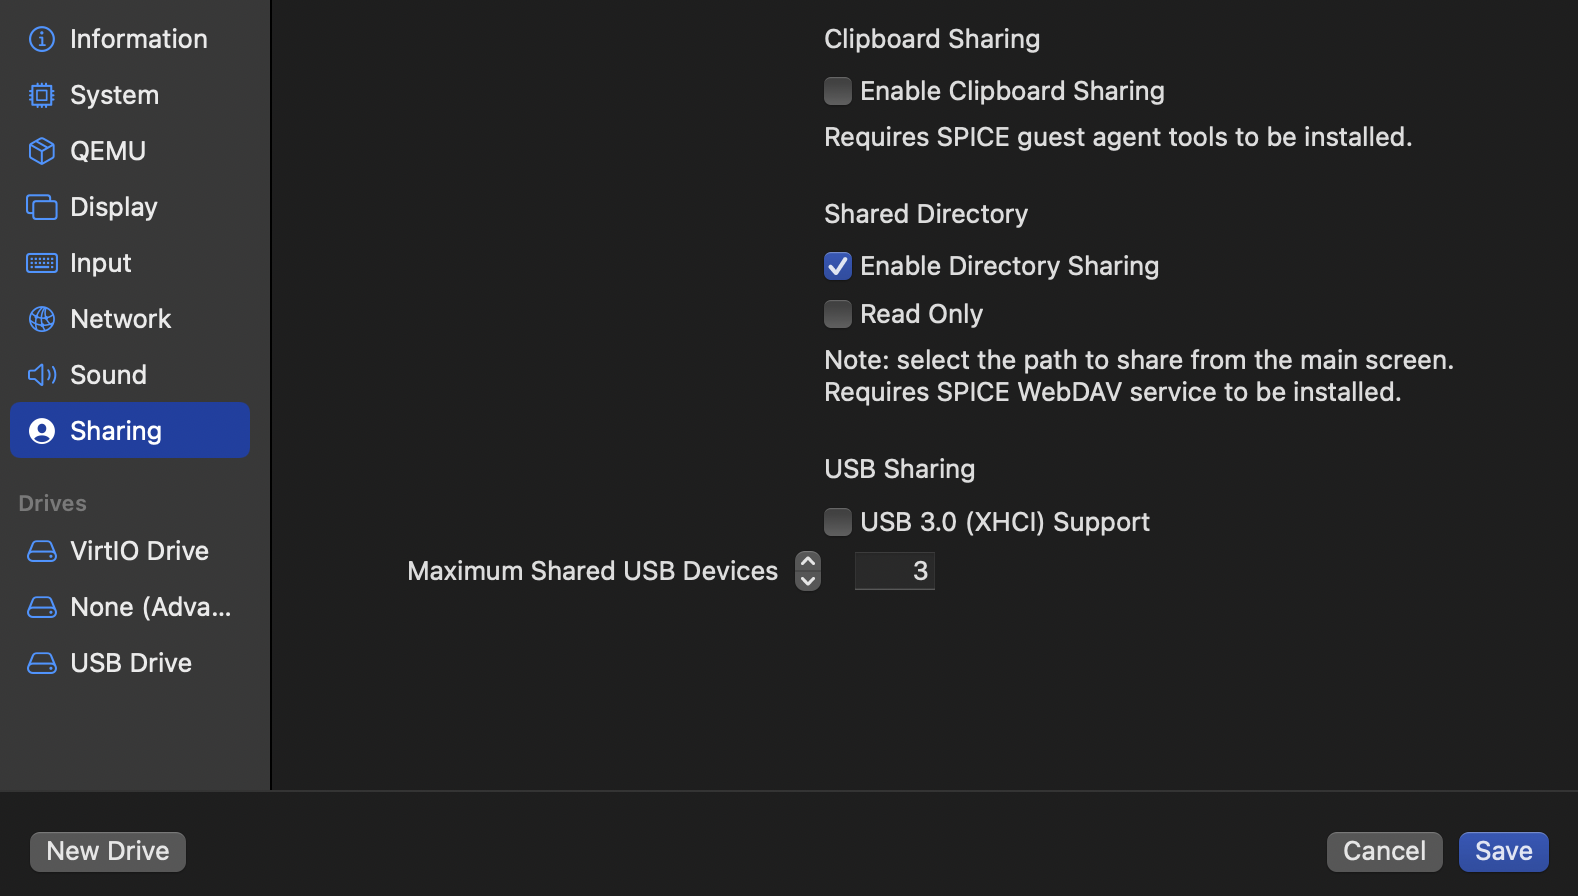
You can enable optionally a feature to be able to share files between
your virtual machine and your host operating system. You again want to
right click and “Edit” the settings for the virtual machine (after it is
shut down). Press “Sharing” and then check “Enable Directory Sharing”.
Now, boot Ubuntu, open a terminal (terminal app if you installed the
GUI, otherwise you are already in the terminal), type
sudo apt install spice-vdagent spice-webdavd to install the SPICE guest tools
package which will allow sharing files.
More links for further information: